Images for the Web
Images on the web take up significantly more space and bandwidth than almost any other kind of content. They're the single biggest contributor to how fast or slow your web pages load.
Preparing images for use on the web is mainly about reducing their file size as much as possible with a minimal compromise in their appearance. This means choosing not only the right file format for the type of image, but also the specific settings used when saving it.
There are lots of different image formats out there! But all images fall into one of two categories: raster or vector.

Here we'll take a look at what's unique about each category of image formats, and how to prepare them for use on the web.
When working on images, always work with the highest resolution and quality you have available, and export copies as needed to use in your designs.
Raster Images
A Grid of Pixels
Raster images are stored as a grid of individual pixels. Every pixel has a color value that is independent of the pixels around it. High resolution images have millions of pixels. This is great for photographs and images that have a lot of detail and texture, but it's an inefficient way to store graphics that are mostly basic shapes and large areas of the same color.
It's important to understand that while we as humans can recognize the shapes and colors to make sense of a raster image, computers (for the most part) cannot. When we look at a photo we can immediately see where the trees meet the sky. Computers basically see a plane of meaningless colors. The browser can display the image, but it can't tell the difference between a basketball, an orange, and someone's face.
Most of the time this is fine. If we want to, say, enhance someone's eyes in a photo, we use an image editor like Photoshop. Photoshop either has filters that use machine learning to find the eyes, or we can literally tell it where they are using a brush tool. In either case Photoshop still doesn't really know that they're eyes—just some lighter pixels next to some darker pixels.
Resolution
Raster images have an inherent size, also called resolution. On the web, resolution refers to the overall dimensions of an image. That is the number of pixels, width and height, that the image contains. Once the image has been saved this doesn't change, so it's important to make sure the image is exported with enough resolution for its intended use.
Oversized images will always look fine when scaled down for your design. Excessively oversized images are unnecessary, but it's always better to be over than under. An undersized image displayed at a larger size than its native resolution will look bad, bad, bad.
As a general rule of thumb, I recommend saving an image at least 2x the largest resolution it might ever be displayed at in your design. For example, if I'm placing an image on my page that may be displayed as large as 800px wide on the largest viewports, I would save the image at about 1600-2000px wide.
Quality and Compression
Compression has to do with the way the data in a raster image is stored, as in bytes on a hard drive. Compression has a lot to do with the quality of a raster image.
Images are always compressed for use on the web. This saves us a lot of file size and therefore bandwidth, but often at the cost of some amount of quality.
File compression comes in two flavors: lossless and lossy.
Types of Compression
Lossless file compression means that some of the data is removed from the file when it is saved, but in a way that the original data can be fully restored.
Pretend the code below represents the RGB values from a few neighboring pixels in a large image:
[0,0,0] [0,0,0] [0,0,0] [0,2,0] [0,0,0]
The number of characters in the code above roughly corresponds to the file's size on disk. The figure above has 39 characters.
Using lossless compression, the pixels are stored roughly like this:
3x[0,0,0] [0,2,0] [0,0,0]
Now we're down to 25 characters. The information is expressed in a shorter way, but when the file is reopened it still gets turned back into its original form. None of the original information is permanently lost, meaning that lossless compression is even better than no compression!
Lossy compression on the other hand does throw some of the original information away, so the full integrity of the original data is permanently lost. Pixels that are near each other are analyzed for similarity. If the values are similar, lossy compression says "good enough!" and crunches them together like so:
5x[0,0,0]
This is only 9 characters—much smaller! But we've permanently lost some of the information.
Jpeg compression has a few different algorithms for different situations, and they're all really smart. We also have finite control of how much compression is applied. If done right, the image will have a significantly smaller file size while looking almost exactly the same.
Lossy compression is perfect for finished, web-ready images. The file size is really small, and the loss in quality doesn't matter.
That said, lossy compression is not good for working files. Every time you re-save a file in a lossy format, it goes through the same process of throwing some information away. For this reason you should never use lossy file formats while editing. You should also be aware of this inherent loss of quality when using files like jpeg as your main archiving format.
Once the data's gone you can't get it back. The best practice is to work on files in lossless formats and only save to a lossy format as the final step. Always retain the higher quality files too.
MP3 files use a remarkably smiliar technique to reduce the size of digital music.
Artifacts
Because the data is being simplified, lossy compression often results in artifacts. Most of the time the effect is very subtle, if not imperceptible, but heavy compression or multiple passes of compression on a file will make it visible.
This is why lossless files are preferred for high quality printing. Artifacts are particularly obvious in photos with textile patterns, textures, and large subtle gradient regions like skies.
The same goes for mp3s. A heavily compressed mp3 will have audibly muddy bass and harsh highs, which is where the compression is usually most heavy handed.
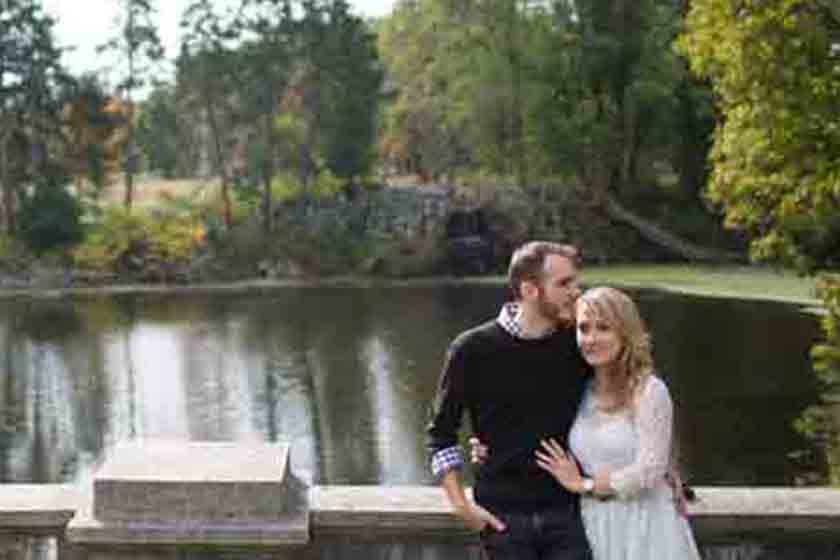
Here's a web-ready, lossy compressed image:

And here is that image saved again at minimum quality (0 out of 100). To show the artifacts a little closer, I cropped the file and saved it one more time.
Load Times Compared
So why should we accept any loss in quality? The reduced file size has a massive affect on bandwidth, load times, and performance.
Let's take a sample photograph and compare about how long it would take to load in different formats. We'll compare a web ready jpeg, a high-resolution jpeg, and tiff.
Although their resolution and file sizes are drastically different, there's virtually no difference in the way these images appear on the page:
File size: 115KB

File size: 3.5MB (approx. 30x bigger).
File size: 123.84MB (approx. 35x bigger than high-quality jpeg, 1080x bigger than web-ready).
| Connection Type | Speed | Web jpeg | Large jpeg | Uncompressed tiff |
| Broadband nat'l avg | 96.25mbps | 0.01sec | 0.29sec | 10.29sec |
| Wireless nat'l avg | 33.88mbps | 0.03sec | 0.83sec | 29.24sec |
| 3G average | 1.5mbps | 0.61sec | 18.65sec | 660.47sec (11min) |
| DSL | 2mbps | 0.46sec | 13.98sec | 495.36sec (8.3min) |
Common Raster Image Formats
| Format | Full Name | Compression | Best Use |
| JPG/JPEG | Joint Photographic Experts Group | Lossy | web-ready/finished photographs, standard printing |
| TIF/TIFF | Tagged Image File Format | None | archival photographs and scans, high quality printing |
| CR2, ARW, NEF, DNG, etc. | Canon Raw 2 / Sony Alpha Raw / Nikon Electronic Format / Digital Negative Graphics | Lossless | archival photographs |
| GIF | Graphics Interchange Format | Lossless | memes. |
Jpeg uses a variable lossy compression algorithm for crunching the data, making file sizes very small. Introduced in 1992 it is now the most widely distributed image format.
Tiff dates back to 1986 with the first scanners which could only store 0s or 1s (black or white), later greyscale, and now deep colors. This format is usually uncompressed, resulting in very large files.
Psd is basically a special kind of container file. Every layer in a psd file is either a tiff or vector data. Psds should never be used on web sites.
Cr2, arw, nef, dng, etc. are proprietary file formats (except non-proprietary dng) containing the raw data exactly as captured by a digital camera's sensor. They require further processing for portable viewing and printing, but are the best format for archiving and long term storage.
Gif was originally created for small graphics on the web, and can handle animation and transparency. It is limited to a 256 color palette. The format is widely supported, but really only exists anymore because of its built-in animation capability.
In order to fake the appearance of having more colors, gifs and other limited-palette formats use a technique called dithering.
Prepping Raster Images for Web
Jpeg is the standard and by far the most common format for raster images on the web. Export settings will depend on the application you're editing in, the required output resolution, and the content of the image itself:
- Resolution >= 2x the largest size the image will ever be viewed at in the browser.
- As much compression as possible without noticeable artifacts. Higher resolution will generally allow more compression (lower quality).
- "Progressive" Jpeg is usually better than "Baseline", if you have the option.
- Color space should be sRGB.
- Embed the color profile, if you have the option.
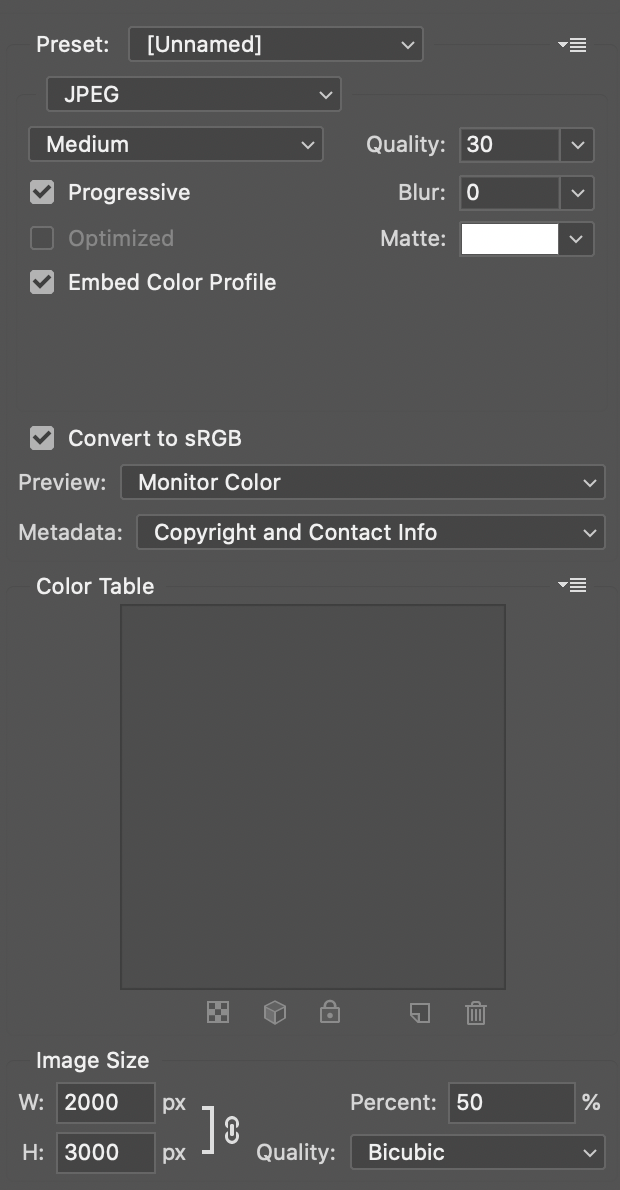
Adobe Lightroom doesn't provide checkboxes for some of these options but it does the "right thing", and it's compression quality is very good. In Photoshop, avoid simply using "Save As" and selecting Jpeg. I personally prefer the "Save for Web (Legacy)" feature. It provides the most control over the exported image's settings, and is comparable to Lightroom's export quality.
As a final step, I also run my photos through ImageOptim or Squoosh, which can further compress the file to save even more space.
Vector Images
Mathematical Data
Vector images are made up of mathematical data—something computers can work with a lot more easily. Instead of a grid of pixels, vector formats use coordinates and equations to draw shapes.
Vector images are essentially a set of instructions for the computer to draw the image, like this:
"Draw #shape1: Start at coordinates 20,50. Draw a line to 30,70. Curve from there to 15,40. Close the shape at 20,50. Fill it with black."
This kind of data structure is not so great for photos, but it's excellent for shapes, logos and illustrations.
Common Vector Image Formats
Vector images almost always come in one of two formats: svg or png. Try to use svg whenever possible.
| Format | Full Name | Compression | Best Use |
| SVG | Scalable Vector Graphics | None/Lossless | non-photographic images - illustrations, logos, vectors |
| PNG | Portable Network Graphics | Lossless | non-photographic images - illustrations, logos, vectors |
Svg a native vector format supported by browsers. It uses text-based xml, which is similar to html. Instead of containing pixel data, svg contains a structured set of instructions for drawing the image. It's very close to the original formats we work with in Adobe Illustrator, Sketch, Affinity Designer, etc. It uses plain text instead of raster data, which often makes the file size very small.
Png is actually a raster format like jpeg, but it's designed for vector images. Png is a replacement for gif, has better color handling, better transparency support, and better compression (typically 5-25% better than gif). It is not intended to replace jpeg however, and is better for vector-based images than photographs. Photographs saved to png are still roughly 5 times larger than an equivalent jpeg.
Scale to Any Size
Most Svg images can scale to any size with no loss in sharpness or visual quality. Again, because they're a set of instructions for drawing the image, the computer can draw the image at any size! It's a unique and frankly awesome quality.
Png is a raster format, so all of the rules about resolution for raster images apply here. Even though the image it's rendered from is vector, a png won't scale to any size.
Compression
Svg images are sometimes "minified", meaning the whitespace is stripped out of the text to make the file a bit smaller. There aren't any compression algorithms that apply to this format.
Png images use a specific kind of compression that cann't always be adjusted.
Svg's Killer Feature
Small files aren't the only thing that makes svg really exciting. Because it's a text-based format, browsers can understand its elements much like html. We can actually "reach into" svg images and manipulate their individual shapes, applying CSS properties and even animation from within the browser! This is very cool, but very much a topic for another time. 😉
Prepping Vector Images for Web
I'll use Adobe Illustrator for svg export instructions, but settings will be similar for any vector application.
- When you're ready to export, go to "File > Export > Export As..."
- Select SVG from the format options at the bottom of the save dialog.
- Most of the time you'll want to check the "Use Artboards" option. With this on, the image will be cropped to match your artboard. With this off, your image will be cropped exactly to the bounds of your image.
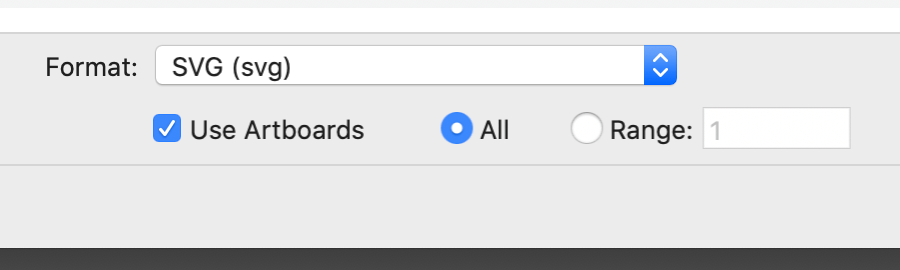
- In the following dialog, select "Responsive". The other settings can be left at their defaults.
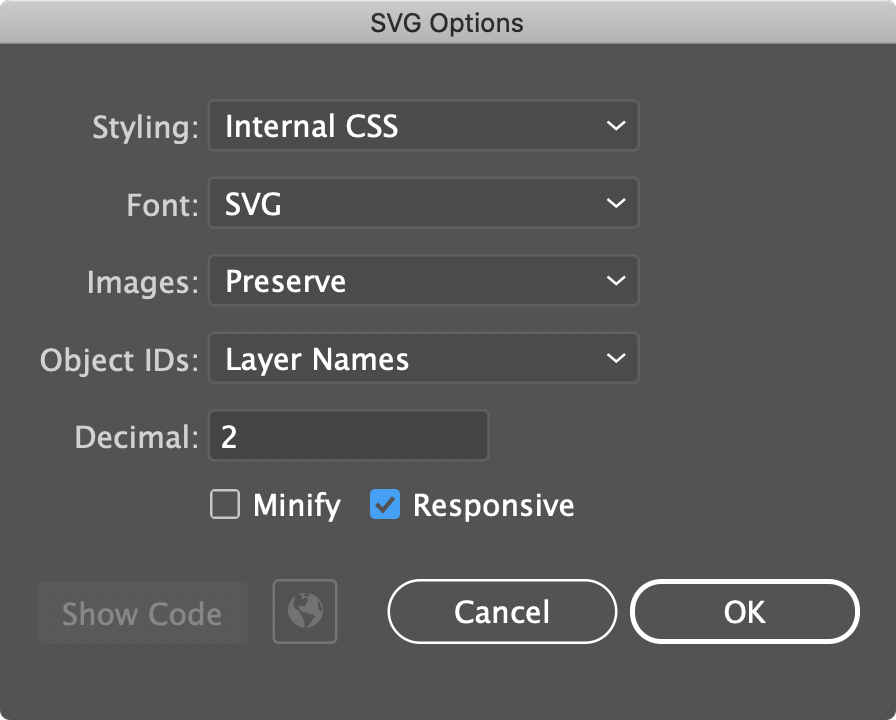
There are multiple ways to insert svg files into your web pages, but the easiest is to just source them in an <img> tag like any other picture.